home ![]() products
products ![]() resource tuner console
resource tuner console ![]() sample scripts library
sample scripts library
The Step-By-Step Illustrated Guide To Using Scripts
 Files and Locations
After installing Resorce Tuner Console, you will find the Demo Scripts folder nested within the directory where RTC is installed. This "Demo Scripts" folder contains 12 subdirectories, each with script examples and sample executable files.
This is how it looks in the Windows File Explorer:
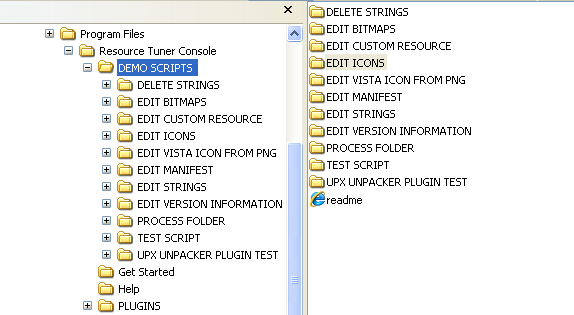
Within each subdirectory, you will typically find three folders:
1. SRC (Source): This folder contains all the necessary files for performing resource manipulations.
2. RELEASE: Currently, the RELEASE folder is empty. This folder is where you will save the modified EXE file once you perform the desired manipulations.
3. DEFS (Definition Files) (optional): Some subdirectories may also contain a DEFS folder. This folder may include additional definition files related to the script examples.
Let's expand the EDIT ICONS folder:
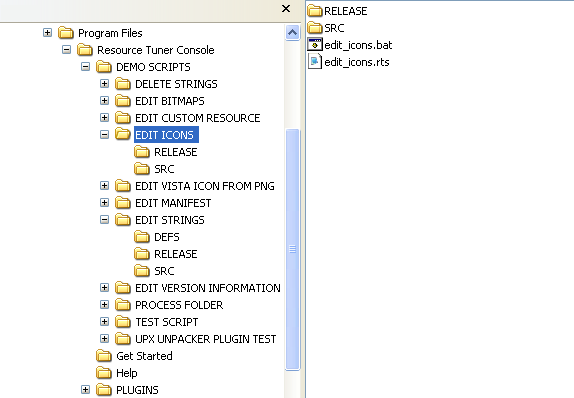
Within the EDIT ICONS subdirectory, you will find two files:
- edit_icons.rts: This file is the RTC script itself, written in plain text. You can open it with any text editor to view and modify the script.
- edit_icons.bat: This file is a batch file used to call the RTC script.
The SRC (Source) folder contains all the necessary files for performing icon manipulations. It includes the target file (DemoApp1.exe), which has an ugly stretched default main icon, and two icon (.ICO) files. One of the icon files, vista_iconset.ico, is a collection of multiple icon images in various sizes and color depths, including the high-resolution 256px icon. The other icon file, icon_3_32x32_8bit.ico, is a single 32px icon.
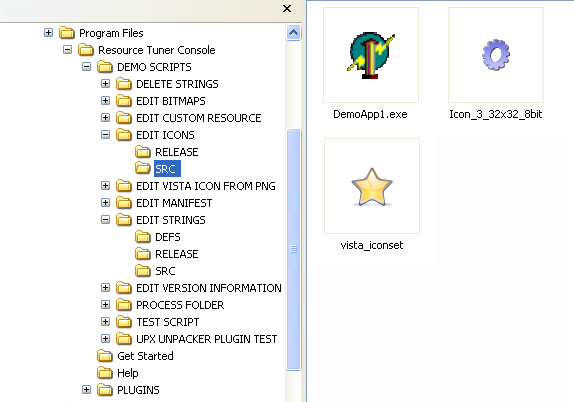
Currently, the RELEASE folder is empty. This is where we will save the modified EXE file.
The pathnames to these source and destination locations are specified in the script code:
  PEFileProxy.OpenFile ".\src\DemoApp1.exe"

  ...

  ResourcesProxy.ChangeIcon "", LangID, CREATE_IF_NOT_EXIST,
  	REPLACE_IF_ITEM_EXISTS, ".\src\vista_iconset.ico"
  ResourcesProxy.ChangeIcon "New Icon Group", LangID, CREATE_IF_NOT_EXIST,
  	REPLACE_IF_ITEM_EXISTS, ".\src\icon_3_32x32_8bit.ico"

  ...

  PEFileProxy.SaveAsNewImage ".\release\DemoApp1.exe"
It's important to note that you have the flexibility to place the source EXE and ICO files in any directory of your choice. However, you must update the script code provided in the sample script to reflect the correct paths to the source and destination locations that you have chosen.
 The Target EXE File
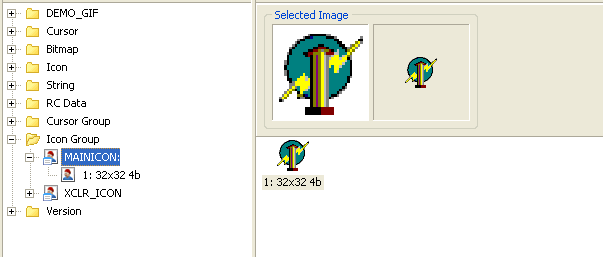
By examining the icons within DemoApp1.exe using Resource Tuner GUI, you can gain insights into the current state of the icons before proceeding with any desired modifications or enhancements.
Once DemoApp1.exe is opened in Resource Tuner GUI, you can see there's only a single 4-bit 32x32 icon in the MainIcon icon group:
 Running The Script
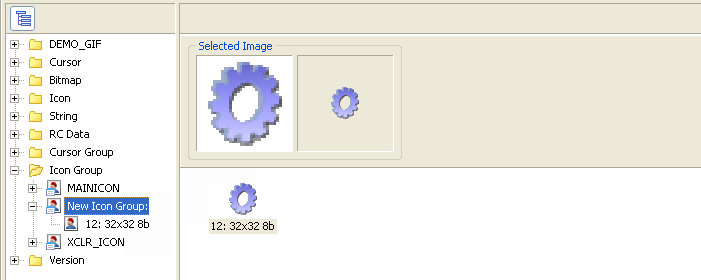
Now we are ready to replace this single main icon with 10 new ones, and add one extra icon to the newly created icon group. In this example we use 2 different icon files on purpose just to show you the flexibility and power of Resource Tuner Console.
![]() To evaluate the sample script on Windows 8 and newer, RTC should not be installed in the Program Files location. Permissions will not allow you to do any operations on files, and running the test script in the PF folder causes an exception.
To evaluate the sample script on Windows 8 and newer, RTC should not be installed in the Program Files location. Permissions will not allow you to do any operations on files, and running the test script in the PF folder causes an exception.
Double-click on the edit_icons.bat batch file to run the script. This batch file triggers the execution of the RTC script.
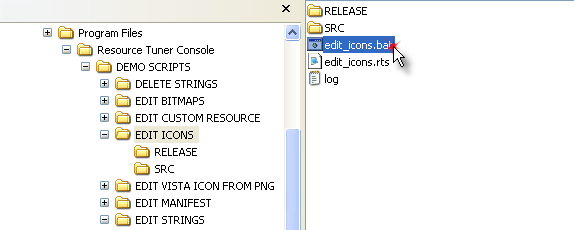
That's it. Upon running the script, the icons will be replaced within a second, and the modified file, DemoApp1.exe, will be saved in the RELEASE folder. Additionally, a log file named log.txt will be generated in the root directory of the EDIT ICONS folder. The path to the log file location is specified in the batch file code.
 Time to See The Changes Made
To observe the changes made to the icons inside the modified DemoApp1.exe file, you can open it using Resource Tuner GUI.
By opening the modified file in Resource Tuner GUI, you can visually verify the changes made to the icons within DemoApp1.exe and explore the added icon group. This allows you to assess the success of the icon replacements and additions performed by Resource Tuner Console.
Once DemoApp1.exe, which should be available in the RELEASE folder, is opened in Resource Tuner GUI, you will be able to examine the changes made to the icons. As mentioned, the old main icon has been replaced with new icons:
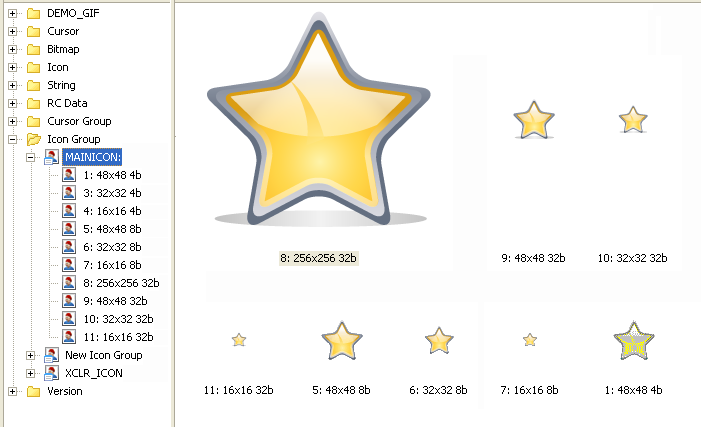
A new icon group named New Icon Group has been added, along with one new icon within that group:
It's worth noting that Resource Tuner Console not only handles large 256px icons in .ICO format but also supports the addition of large icons in .PNG compressed format from standalone .PNG files. For more details and a closer look at this feature, you can explore the EDIT VISTA ICON FROM PNG folder, which demonstrates the capabilities of Resource Tuner Console in working with .PNG icons.
![]() Download Resource Tuner Console and learn how it can make you more productive.
Download Resource Tuner Console and learn how it can make you more productive.